How to Make YouTube Videos with NotebookLM: A Complete Guide
How to Make YouTube Videos with NotebookLM: A Complete Guide
If you’ve ever wanted to start publishing videos on YouTube but stopped at the thought of video editors, editing timelines, and hours of manual work — this article is for you.
I’ll show you how to go from an idea to a published YouTube video in about 30 minutes using Google NotebookLM and a couple of open-source scripts. No After Effects. No Premiere. No DaVinci Resolve. No video editor at all.
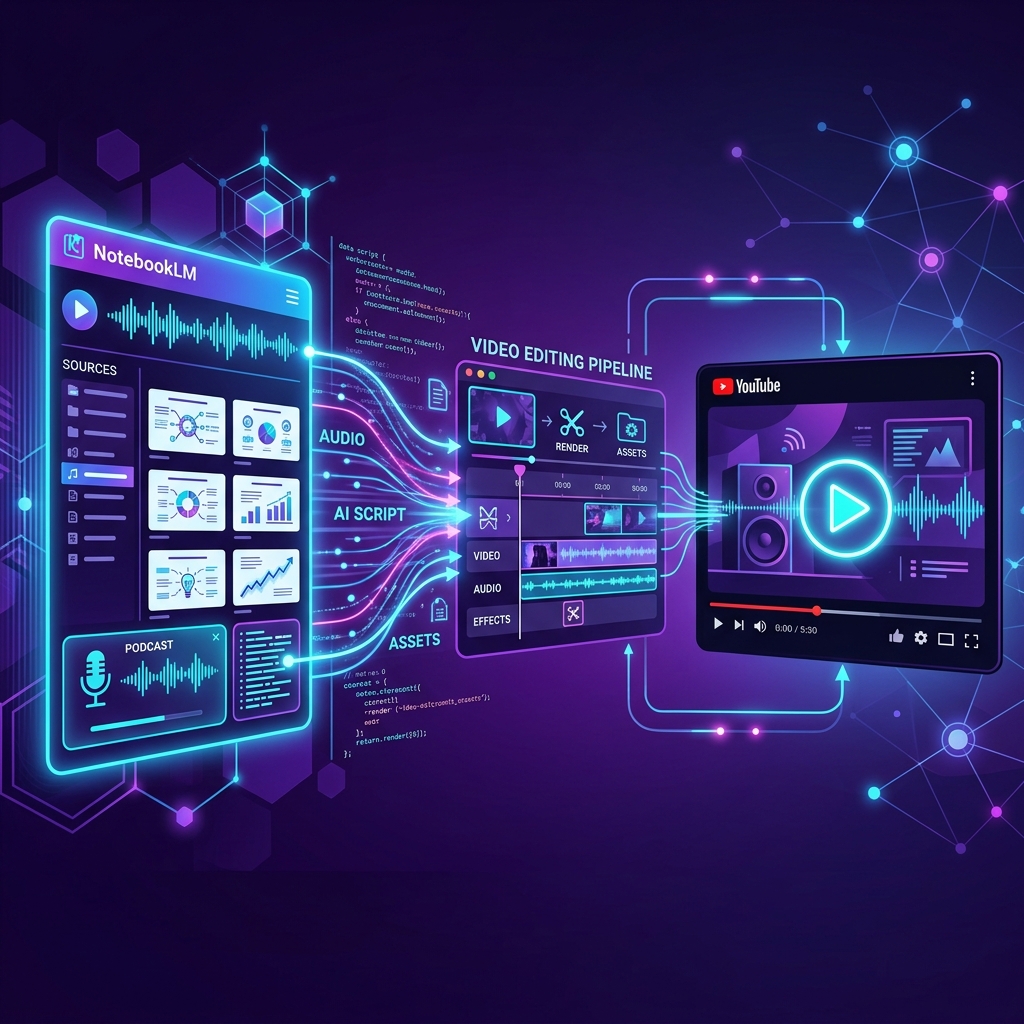
What NotebookLM Has to Do with Video
NotebookLM is an AI tool from Google that can analyze your documents and generate content from them. The key features we care about:
- Audio podcast generation — upload an article, research paper, or notes, and NotebookLM creates an audio narration with a natural voice
- Slide presentation generation — from the same material, NotebookLM can create a PDF slide deck
- Ready-made video generation — in some modes, NotebookLM can produce complete videos
In other words, NotebookLM handles the hardest part — content creation. All that’s left is assembling it into a format YouTube accepts and preparing the metadata.
Here’s What the Result Looks Like
Before we dive into the process, here are example videos made with this workflow:
- 🎬 Анализ Плато: Как отличить надежный оптимум от переобучения — a video-maker example: a PDF presentation + audio (from NotebookLM) assembled into a finished video with synced slides
- 🎬 Walk-Forward Optimization: The Only Honest Strategy Test — a video-youtube-prepare example: NotebookLM generated the finished video, and the script prepared metadata for it (title, description, tags, timestamps, subtitles)
In both cases — no video editors, no manual work. Everything assembled automatically.
Two Scenarios: Which One Are You?
Depending on what NotebookLM gave you, you’ll use one of two tools:
Scenario 1: You have audio + slides → need to build a video
This is when NotebookLM generated an audio narration and a PDF presentation separately, and you need to combine them into a video.
Tool: video-maker
Scenario 2: You already have a finished video → need YouTube metadata
NotebookLM can generate finished videos too. But for YouTube that’s not enough: you need a title, description, tags, chapter timestamps, subtitles. All of this can be generated automatically.
Tool: video-youtube-prepare
Let’s walk through both.
Scenario 1: Building a Video from Audio and Slides
Step 1: Generate Content in NotebookLM
- Open NotebookLM
- Create a new notebook and upload your material — articles, notes, PDFs, links
- Ask NotebookLM to generate an audio podcast from your material
- Ask it to generate a slide presentation
- Download the audio (
.m4aor.mp3) and slides (.pdf)
Step 2: Install the Tools
# Clone the repo
git clone https://github.com/suenot/video-maker.git
cd video-maker

# Create Python virtual environment
python -m venv venv && source venv/bin/activate

# Install Python dependencies
pip install openai-whisper pillow pytesseract

# System dependencies (macOS)
brew install ffmpeg poppler tesseract
Step 3: Place Your Files
mkdir -p input/my-video
cp ~/Downloads/audio.m4a input/my-video/audio_en.m4a
cp ~/Downloads/slides.pdf input/my-video/slides_en.pdf
Step 4: Run It — One Command
bash scripts/run_pipeline.sh enThat’s it. Seriously, one command. The pipeline automatically:
- ✅ Converts PDF to images — each slide becomes a PNG
- ✅ OCRs each slide to extract text
- ✅ Transcribes audio via Whisper — gets text with word-level timestamps
- ✅ Syncs slides to audio — matches spoken text to slide text
- ✅ Assembles an MP4 video via FFmpeg
- ✅ Generates SRT subtitles
- ✅ Researches relevant YouTube tags
- ✅ Generates metadata: title, description, timestamps
- ✅ Creates a 1280×720 thumbnail
Or run each step individually if you want more control:
python scripts/pdf_to_images.py --pdf input/my-video/slides_en.pdf --out-dir temp/slides --dpi 200
python scripts/extract_pdf_text.py --images-dir temp/slides --output temp/slides_text.json --lang eng
python scripts/extract_subtitles.py --audio input/my-video/audio_en.m4a --output temp/subtitles.json --model base --language en
python scripts/sync_slides.py --subtitles temp/subtitles.json --slides-text temp/slides_text.json --output temp/timeline.json
python scripts/generate_video.py --timeline temp/timeline.json --slides-dir temp/slides --audio input/my-video/audio_en.m4a --output output/my-video.mp4
How the Sync Magic Works
This is the most interesting part. The script doesn’t require manual markers like “show slide 3 at second 42.” It figures it out on its own.
The algorithm is a greedy forward-matching approach:
- Whisper provides word-level timestamps of what’s being said
- OCR (Tesseract) extracts the text from each slide
- The script walks through transcription segments and scores each one against the current slide and the next few slides using word overlap + bigram matching
- It advances to the next slide only when it scores clearly higher and the current slide has been shown long enough
Slides never go backwards. Simple, but it works surprisingly well for educational content where the speaker typically follows the slide order.
What You Get
output/
├── my-video.mp4           # Finished video
├── my-video.srt           # Subtitles for YouTube upload
├── my-video_metadata.json # Metadata (machine format)
├── my-video_metadata.txt  # Metadata (copy-paste into YouTube Studio)
└── my-video_thumbnail.png # Thumbnail
The _metadata.txt file is ready-made text you just paste into YouTube Studio: title, description with chapter timestamps, tags.
Scenario 2: Preparing Metadata for a Finished Video
If NotebookLM already generated a finished video — or you recorded it any other way — you still need YouTube metadata. That’s the second tool.
The key insight: you already have a blog article for every video. The article has a title, description, tags, and section headings. The tool reuses all of that to build YouTube metadata automatically.
Installation and Running
git clone https://github.com/suenot/video-youtube-prepare.git
cd video-youtube-prepare
pip install openai-whisper

python scripts/prepare_metadata.py \
    --video input/my-video.mp4 \
    --slug my-article-slug \
    --output-dir output/my-article-slug \
    --whisper-model base
The tool:
- Extracts audio from the video
- Transcribes speech via Whisper
- Generates SRT subtitles
- If there’s a blog article — matches section headings to speech, builds chapter timestamps
- Extracts tags from article content
- Assembles everything into ready metadata in both EN and RU
About Tags
YouTube tags should be thematic phrases (2–4 words), not single words. The tool builds them from:
- Article section headings, split at natural separators
- Key phrases from the description (2–3 words)
- Frontmatter tags and their pairwise combinations
- Brand tags
No external APIs — everything comes from your content. Article-derived tags often outperform manually researched ones because they use the exact terminology your target audience searches for.
The Full Workflow: From Idea to YouTube in 30 Minutes
| Step | What you do | Time |
|---|---|---|
| 1 | Upload material to NotebookLM | 2 min |
| 2 | Generate audio and slides | 5 min |
| 3 | Download files and place in input/ | 1 min |
| 4 | Run run_pipeline.sh | 10–15 min (waiting) |
| 5 | Open YouTube Studio, upload video | 2 min |
| 6 | Copy metadata from .txt file | 2 min |
| 7 | Upload subtitles and thumbnail | 1 min |
Total: ~30 minutes, of which 15 are just waiting for the script. This used to take 2+ hours of manual work.
Technical Details
Video Encoding
On a Mac with Apple Silicon, the default codec is hardware-accelerated HEVC via VideoToolbox — fast and small files. YouTube re-encodes everything anyway, so smaller file = faster upload processing.
| Codec | Speed | When to use |
|---|---|---|
hevc_videotoolbox | Fast (GPU) | Default. Best balance |
h264_videotoolbox | Fastest (GPU) | Maximum compatibility |
libx264 | Slow (CPU) | For Linux or when no GPU |
Video is encoded at 1920×1080 at 1 fps — slides are static, there’s no motion to capture. YouTube handles this fine, and it avoids OOM issues with the concat demuxer.
Whisper Models
| Model | Speed | Accuracy | When to use |
|---|---|---|---|
tiny | Instant | Medium | For testing |
base | Fast | Good | Default |
small | Medium | High | For important videos |
medium | Slow | Very high | For complex audio |
large | Very slow | Maximum | When every word matters |
Bilingual Support
Both tools handle English and Russian out of the box. A language flag (en / ru) is passed at runtime, and metadata is generated separately for each language.
Requirements
Both tools need: Python 3.9+, FFmpeg (brew install ffmpeg), OpenAI Whisper (pip install openai-whisper).
video-maker additionally: Poppler (brew install poppler), Tesseract (brew install tesseract), Pillow + pytesseract (pip install pillow pytesseract).
Bonus: Agent Skill for Claude Code
If you use Claude Code, the video-maker repo includes a .claude/skills/youtube-video-publishing.md file — an agent skill that teaches Claude Code the entire workflow.
Open the project in Claude Code — and the agent understands the full pipeline: which codecs to use, how to structure descriptions, how to filter OCR, what YouTube Education fields to fill.
The skill covers:
- Title rules — keyword placement, 70-char visibility limit, no clickbait
- Description template — SEO hook in first 150 chars, timestamps from slide titles, article link, Telegram CTA
- Tag pipeline — YouTube Suggest API + competitor analysis + intent phrases, 2–4 word thematic phrases only
- Encoding rules — why
hevc_videotoolboxat 1 fps, when to fall back tolibx264 - OCR filtering — letter-ratio gate, fragment detection, ALL CAPS merging
- YouTube Education — Category, Type, Level, Problems auto-generation
You can say “generate a video from these files” and the agent will do everything correctly.
Beyond Slides: Other Open-Source Video Tools
My tools solve a specific problem: slides + narration → YouTube. But the video automation ecosystem is broader. Here are two projects worth knowing:
video-use: Video Editing via Claude Code
video-use is an open-source skill that lets you edit videos directly through Claude Code (or any agent with shell access).
How it works: you drop raw footage into a folder, open Claude Code, and say “edit these into a launch video.” The agent:
- Cuts out filler words (
umm,uh, false starts) and dead space between takes - Auto color grades every segment
- Applies smooth 30ms audio fades at every cut so you never hear a pop
- Burns subtitles in your style — 2-word UPPERCASE chunks by default
- Generates animation overlays via HyperFrames, Remotion, Manim, or PIL
- Self-evaluates the rendered output at every cut boundary before showing you anything
The key insight: the LLM never “watches” the video. It reads it — through an ElevenLabs Scribe transcript (word-level timestamps + speaker diarization) and on-demand visual composites (filmstrip + waveform). Instead of 30,000 frames × 1,500 tokens = 45M tokens of noise — just 12KB of text and a handful of PNGs.
This is a fundamentally different approach from my video-maker. My pipeline is optimized for educational slide-based videos. video-use is a universal editor for any content: talking heads, montages, tutorials, interviews.
OpenShorts: Full Platform for Short-Form Video
OpenShorts is a self-hosted platform (Docker) that combines three tools:
-
Clip Generator — automatically cuts long-form videos (podcasts, webinars, livestreams) into viral-ready 9:16 shorts for TikTok, Instagram Reels, and YouTube Shorts. Uses Google Gemini for viral moment detection, face tracking via MediaPipe + YOLOv8, auto-subtitles via faster-whisper.
-
AI Shorts — generates marketing videos with AI actors. Describe your product or paste a URL — the platform generates the script, an AI actor (Flux 2 Pro), voiceover (ElevenLabs), lip-sync (Hailuo + VEED), b-roll, and final assembly. Cost: from $0.65 per video.
-
YouTube Studio — AI thumbnail generation, 10 viral title suggestions, auto-descriptions with chapter timestamps, one-click YouTube publishing.
Plus one-click auto-publishing to TikTok, Instagram, and YouTube simultaneously, with scheduled uploads.
Unlike paid alternatives (Opus Clip, CapCut, Vizard, Klap, Descript), OpenShorts is completely free, open source, no watermarks, no upload limits. You only pay for AI APIs (Gemini, fal.ai, ElevenLabs), and most have generous free tiers.
Limitations
A few things to keep in mind:
- Sync quality depends on slide text. Graphical slides with little text sync worse. Works best with educational slides that have headings and bullet points.
- Single speaker. The pipeline assumes continuous narration from one voice.
- macOS by default. Hardware HEVC acceleration works on Apple Silicon. On Linux, use
libx264. - NotebookLM can be unpredictable. Generation quality depends on input material. The more structured your notes — the better the result.
Want to Try It?
All tools are open source:
- 🔧 video-maker — builds video from audio + PDF
- 🔧 video-youtube-prepare — generates YouTube metadata
- 🎬 video-use — video editing via Claude Code
- 🎬 OpenShorts — full platform for shorts and AI video
Important:
video-makerandvideo-youtube-prepareare not turnkey products — they’re starter templates. They work out of the box for the basic scenario, but they’re designed for you to customize with any AI agent (Claude Code, Codex, Cursor, etc.). Fork them, adapt to your brand, description style, and content format.
Use NotebookLM for content creation, and the scripts for automatic assembly. It’s the fastest path from idea to YouTube I’ve found.